
Ever wonder if one simple snap can hold centuries of memories? Imagine your camera chatting away with the old streets and secret carvings of a bygone era.
In those historic city centers, even the well-known spots hide little stories, just waiting for you to discover them. This guide is packed with smart tips and fun ideas to help you let your photos speak with history.
So, if you’re ready to see familiar places in a new glow and learn tricks that work from sunlit exteriors to cozy, quiet corners, come along with me on this visual journey.
Essential Photography Strategies for Historic Cities
When you set out to capture historic cities, imagine each photo as a little chat with the past. Every image becomes a story, an invitation to explore the hidden details and memories tucked away in ancient corners. Try framing well-known landmarks from unusual angles or focusing on subtle carvings that many might pass by. For example, get close to a weathered inscription on an old wall and let the textures tell you its tale.
Next, mix your creative storytelling with smart camera techniques. Use AUTO-ISO along with your manual aperture and shutter settings to handle the changing light in these timeless spots. This tip really comes in handy when you need to switch fast from bright outdoor scenes to mellow, shadowy interiors. Experiment with slow shutter speeds under low-light settings to capture movement and mood, or adjust quickly in sunny areas to keep everything crisp and clear.
Finally, reach out and connect with the local community to boost your skills. Join a workshop, take a guided tour, or simply swap ideas with fellow explorers who love urban heritage as much as you do. These shared experiences can spark fresh perspectives and innovative techniques that go beyond what's in your typical guide. Each connection adds a new layer of meaning to your photographic journey through history.
Conducting Effective Research Before Historic City Shoots

Before you set off with your camera, take a moment to really get to know the history and local customs of your chosen spot. Look up its background, check the opening times, and find out if there are any special rules for taking pictures. For example, if you're eyeing a centuries-old building, a quick read-up might tell you if you need extra permission to snap that perfect shot.
Next, wander a bit off the beaten path. Instead of staying in the crowded city center, explore quieter neighborhoods where hidden alleys and peaceful streets can offer you fresh, creative photo angles. It’s like discovering a secret shortcut that makes your adventure even more special.
Then, mix your careful research with some local tips to build a real plan. Find out if there are local legends or famous families that add a unique twist to the history of the place. And don’t forget the practical details, know what’s allowed regarding tripods, drones, or even flash gear. This way, your shoot turns from a simple outing into a thoughtful journey, where every click of the camera respects and celebrates the city’s living heritage.
Optimal Lighting Conditions for Timeless Urban Scenes
Imagine catching that perfect moment when the soft glow of morning light touches ancient stone facades. During the golden and blue hours, your shots come alive with warm, inviting hues, revealing every intricate detail in centuries-old carvings and weathered monuments. Picture a historic column drenched in gentle early light, as if it's silently sharing tales of admiration through the ages. This approach transforms familiar urban scenes into vibrant stories rich with character.
Next, try experimenting with long exposures in those low-light moments. Let natural shadows and beams of side light trace the textures on columns and cobblestones, turning everyday views into compelling visual narratives. Tweak your camera settings during these magical moments, and you'll uncover lighting secrets that give your photos a timeless, artistic feel.
- Early golden hour: about 30 minutes after sunrise for soft, warm highlights.
- Blue hour: right before dawn or dusk for a cool, ambient glow.
- Late afternoon side light: perfect to enhance the textures on carved details.
- Long exposure in low light: captures blurred movement and subtle shifts in shadow.
Composition and Framing Techniques for Classic Monuments
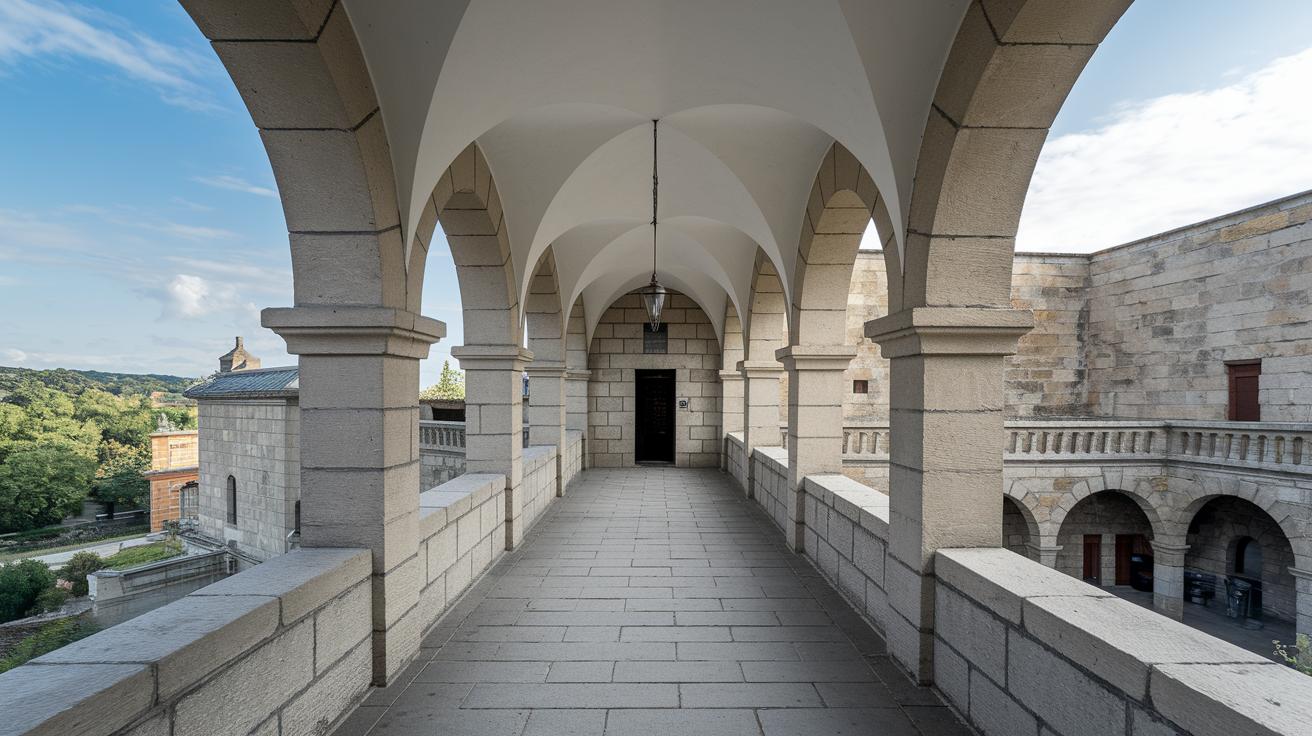
Using Leading Lines
When you're out exploring historic sites, look for natural paths like long colonnades, narrow alleys, or sloping roofs that lead your eye right to the main feature. A shot from a balcony with a slight tilt might reveal a string of arches that almost pull you right into the moment. Imagine a stone walkway where every line guides your gaze toward an ancient doorway, each detail deepens the story the scene tells.
Framing with Contextual Elements
Try shooting through doorways or archways to add hints of history to your photos. Noticing elements like weathered window frames or carved stone details gives your image a warm sense of place and timeless charm. Picture the soft interior of an old building peeking out behind faded murals, it’s like getting a secret glimpse of both the structure and the lives it has touched.
Balancing Foreground and Background
Mix up your view by focusing on close-up details while letting the historic skyline gently blur in the background. Zoom in on an intricate mosaic or a worn inscription, then capture the surrounding rooftops to frame the scene. This blend of intimate details with a broader urban view creates a layered story that connects personal discoveries with the place’s long history.
Camera Settings and Lens Choices for Heritage Site Shots
When you step into a historic site, your camera becomes your passport to adventure. Start with AUTO-ISO paired with manual aperture and shutter settings to smoothly handle both bright courtyards and shadowed interiors (it’s like having the perfect travel companion for any scenario). A wide-angle zoom lens in the 16-35 mm range is your go-to when you want to capture the full scope of grand structures, making every frame feel as complete as a postcard from your favorite destination.
And then there’s the tilt-shift lens, which comes in handy when you need to fix skewed lines, keeping the true shape of columns and arches intact. For cozy, dim spaces like a small chapel, a fast prime lens at 35 mm or 50 mm lets you snap clear and detailed shots without needing a flash. Setting your aperture between f/8 and f/11 makes sure every carved detail and textured stone gets the shine it deserves.
| Lens Type | Recommended Setting | Use Case |
|---|---|---|
| Wide-angle zoom | AUTO-ISO; Aperture f/8–f/11 | Capturing full structures and sweeping urban views |
| Tilt-shift | Manual adjustments for perspective correction | Correcting converging lines in architectural shots |
| Fast prime | 35 mm or 50 mm; high sensitivity | Low-light capture in intimate interior spaces |
Next, adjust these settings based on the unique feel of the heritage site you explore. Experimenting with each lens is a bit like trying out different routes on a road trip; every method reveals new textures and details of historic architecture. With a blend of creative passion and smart camera choices, every shot you take becomes a timeless snapshot of history in motion. Enjoy the journey and keep discovering!
Exploring Creative Angles and Perspectives in Vintage Districts
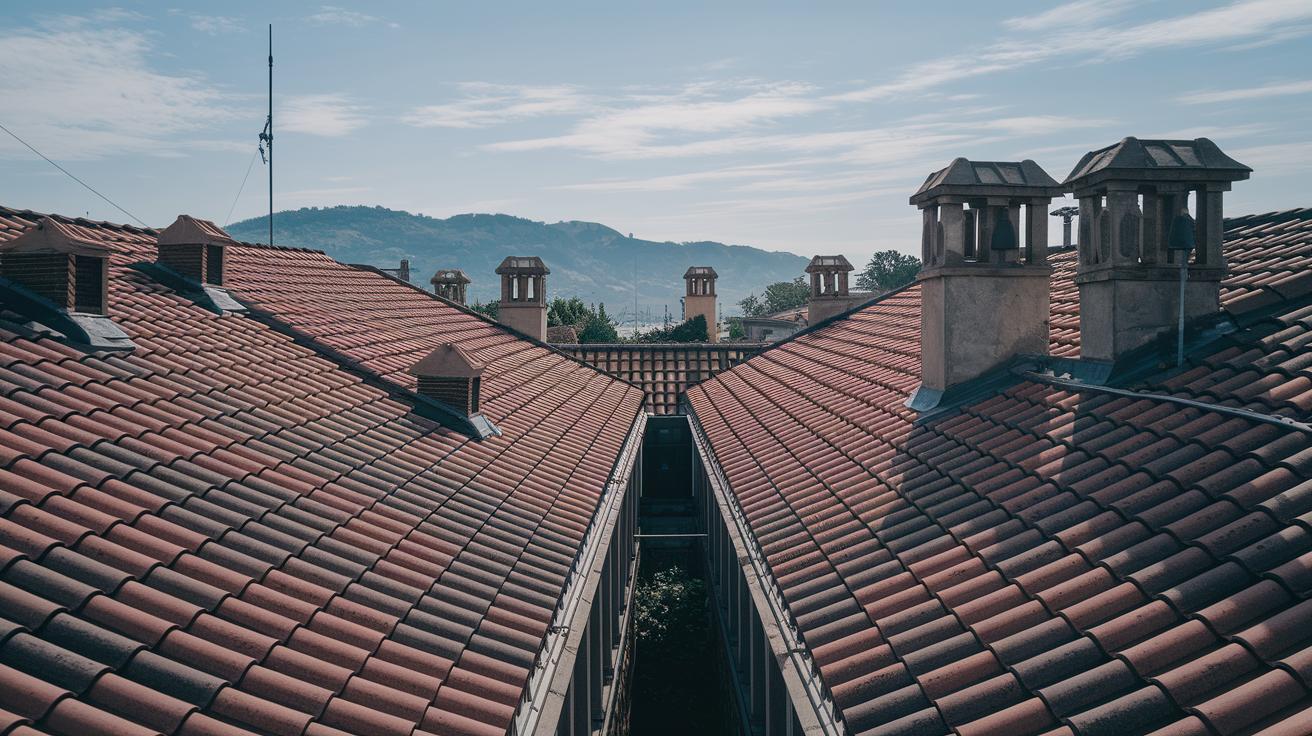
When you're out exploring old neighborhoods, let your camera see the magic from a different spot. Instead of taking the usual photos, try finding a rooftop or a cozy terrace that gives you a brand-new view of tile roofs and twisting lanes, revealing the district’s unique rhythm.
While strolling along narrow alleys, get down low to focus on the worn flagstones underfoot. This fresh perspective transforms everyday details into dramatic, eye-catching stories of a bygone era that invite your curiosity.
Next, keep an eye out for reflective surfaces that add balance and depth to your shots. Look for puddles or shiny urban features that capture the intricate details above. Then, frame your picture with classic elements like street lanterns or iron grilles to create natural borders that speak of time and place, turning familiar sights into artistic treasures.
Incorporating Cultural Context and Narrative in Historic City Photography
Every shot in a historic city hides its own little story. It’s not just about old buildings; it’s about the heartbeat of the place. By mixing in personal touches, you capture the true spirit and energy of a city. When local residents appear in your photos, they share moments of quiet wonder or a friendly smile that brings life to ancient stone walls. They turn a simple click into a shared experience, inviting you and the viewers to feel connected.
Including Local Residents
Try capturing moments that respect each person’s unique past. Imagine a warm portrait in a bright market or a reflective profile against timeworn walls. These images speak volumes, preserving memories and the traditions that make the place special.
Don't miss out on the physical traces of history, either. Artifacts, plaques, or heirlooms offer a peek into the world behind every old facade. These keepsakes, whether found tucked away in a quiet corner or passed down through generations, serve as friendly guides to the past.
Storytelling Through Objects
Focusing on these timeless items grounds your photos in the real essence of the city. They act like silent narrators, sharing stories of days gone by, and deepening the connection between past and present in every frame.
Post-Processing Tips and Period Editing Strategies for Historic Scenes

Once you’ve captured your historic scenes, the adventure isn’t over. In the editing suite, you can turn your photos into timeless memories. Imagine using film-like color grades, warm sepia or a soft muted teal, to add a gentle, classic feel that takes you back in time. And when you boost the midtone contrast, the fine details like carved stone and weathered textures come to life, almost whispering secrets of the past.
Next, try balancing your colors by desaturating selectively. This little trick helps keep the key hues of the era while softening others, so every image feels naturally vintage. And if you’re editing a whole series of photos, batch-applying presets can be a real lifesaver, ensuring each shot beautifully matches your historic narrative.
- Try out film-style color grading for a warm sepia or soft muted teal vibe.
- Boost midtone contrast to highlight intricate stone carvings and textures.
- Use selective desaturation to keep important period colors vibrant.
- Batch-apply presets to ensure a seamless, period-authentic feel across your photos.
Respectful Practices and Permissions at Historic Landmarks
When snapping photos at historic sites, be gentle and respectful. Check the local rules for using your tripod, drone, or flash, and make sure you know if commercial photography is allowed. If you're planning a professional shoot, get your permits in advance so everything runs smoothly.
This kind of thoughtful planning shows you value the place's history and helps build trust with local guides who know every little rule. Working hand-in-hand with local experts means you're honoring the customs and traditions that make each site unique. In truth, treating each spot with care not only keeps its legacy intact but ensures your photos capture its true spirit.
Final Words
In the action, this post showcased how to capture timeless urban scenes with clear, creative techniques. We covered everything from adjusting camera settings to choosing thoughtful angles and practicing mindful research before your shoot.
Each tip blends technical know-how with local insights, making your work feel genuine and grounded. Use this guide to photography in historic cities as a handy reference to capture the charm of old streets and storied monuments with confidence and heart.
FAQ
What does a guide to photography in historic cities near California and Texas cover?
A guide to photography in historic cities near California and Texas covers key techniques for capturing heritage sites, from scouting historic neighborhoods to using optimal lighting and smart camera settings that reveal authentic details.
What does urban photography encompass through ideas, examples, and cityscape shots?
Urban photography encompasses capturing energetic city scenes by exploring creative angles, framing modern structures, and using inspiring examples from noted photographers to highlight textured streets and timeless urban forms.
What is the 3:1 rule in photography?
The 3:1 rule in photography describes a lighting guideline where one light is three times brighter than its counterpart, creating balanced contrast and depth that enhance textures and details in your photos.
What is the 5 minute rule in photography?
The 5 minute rule in photography suggests waiting briefly before shooting, allowing light and subjects to settle naturally so that images capture a more genuine mood and composition.
What are the 5 W’s in photography?
The 5 W’s in photography prompt addressing who, what, where, when, and why, guiding you to frame images with clear context and meaningful storytelling behind each shot.
What are the 7 basics of photography?
The 7 basics of photography include settings like shutter speed, aperture, ISO, composition, focus, lighting, and white balance, forming the essential building blocks for creating clear and engaging photos.