
Ever wondered why some sunset photos make you pause and smile? It almost feels like those moments hold a secret magic that draws you in. When you’re out traveling, catching that perfect sunset might seem like trying to grab a fleeting dream. But with a few handy tips, you can turn every shot into something truly memorable.
In this guide, we’ll chat about setting your camera up just in time, finding that perfect little spot where the sky really sings, and adjusting your settings so you capture warm, glowing colors. Each tip is like a mini adventure to help make your travel photos pop and transform ordinary moments into unforgettable memories.
Overview: Quick Strategies for Capturing Sunsets While Traveling

Imagine getting there 30 to 60 minutes before sunset so you have plenty of time to set up your shot. A handy tip is to shoot in RAW with your White Balance set to Daylight or Cloudy, this locks in those warm, rich hues. Picture it: you're capturing the sky's transformation, having chosen the perfect spot by quickly searching “[location] sunset” or even checking Google Maps Street View.
Next, this guide dives into several travel-friendly topics to help you nail that sunset photo:
| Topic | Description |
|---|---|
| Location Scouting | Finding the ideal place to capture nature’s show |
| Camera Setup | Getting your gear ready for action |
| Composition | Arranging the scene for that perfect shot |
| Planning & Timing | Knowing exactly when to press the button |
| Post-Processing | Tweaking your photo afterwards to make it shine |
Each of these tips brings you one step closer to those flawless sunset photos, even when Mother Nature likes to change things up.
Scouting Prime Sunset Locations on Your Travels

Finding that ideal spot to capture a sunset shot is like unlocking a secret treasure on your adventure. Try a simple search like "Santa Monica sunset" on stock-image sites to quickly gather ideas and see the different looks each landscape offers in those soft, fading moments of daylight. Google Maps Street View is also a handy tool, it lets you check the horizon and nearby features, so you can decide on the best angle before you even leave home.
Next, explore local photo forums or Instagram hashtags like #SunsetSantaMonica. These community tips often unveil hidden gems off the usual tourist paths, giving you unique settings for that perfect dusk capture. Remember, as the seasons change, so does the angle of the sunset. Keeping an eye on these shifts can lead you to even more stunning shots.
Plan to get to your chosen spot about 30 to 60 minutes before Golden Hour. This way, you have time to set up your gear and let the soft, warm light work its magic. A little extra time means you can test different routes and angles, making sure every shot captures the unforgettable, glowing colors of the sky.
Optimal Camera Settings for Travel Sunset Photography
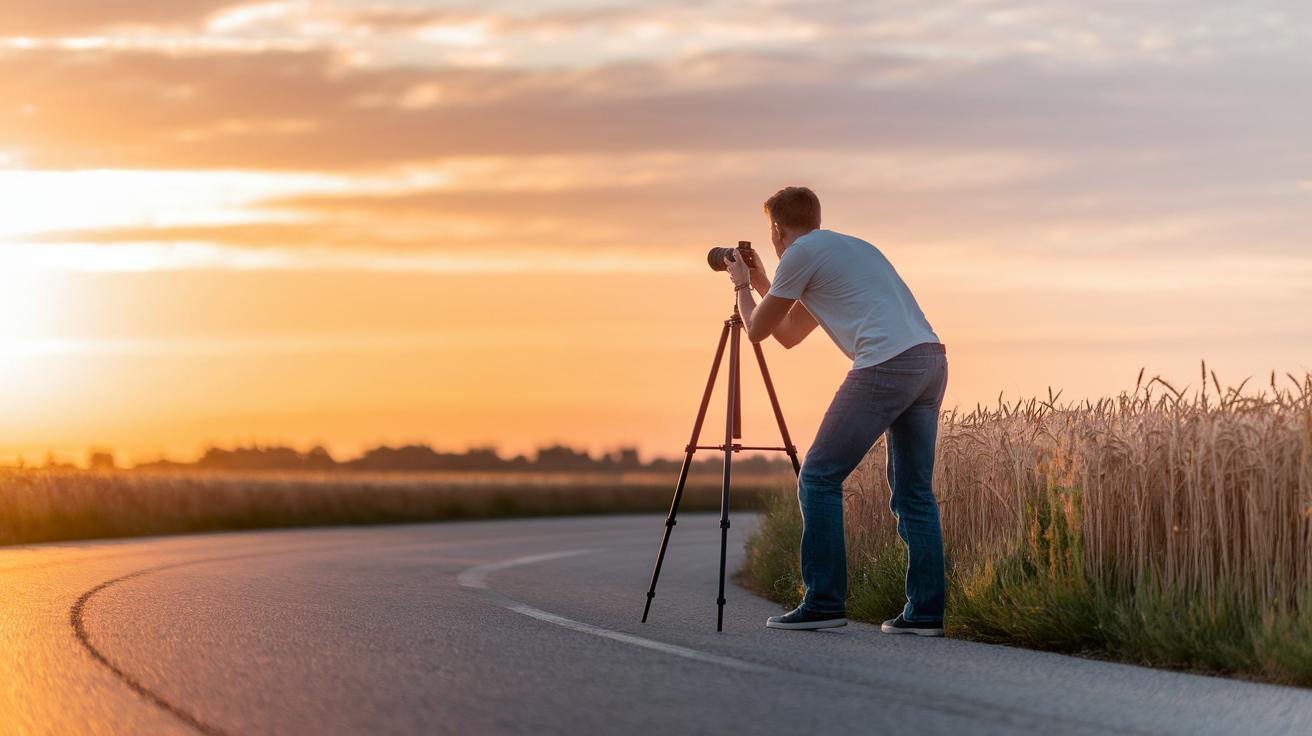
Shooting in RAW format captures every soft, shifting hue of the sunset. Picture snapping a shot as the sky lights up and later fine-tuning each color to mirror that breathtaking display. Instead of the Auto setting, choose Daylight or Cloudy for your white balance to bring out a warm, inviting glow.
Aperture Priority mode is perfect for these moments. Set your aperture between f/8 and f/16, around f/11 works great, to keep both the vibrant sky and the detailed foreground in clear focus.
Keep your ISO low (around 100 to 200) to minimize noise, and if you're using a slower shutter speed (slower than 1/60 sec), grab your tripod to keep things sharp during those dimmer instants.
Next, set your metering to Evaluative and leave your exposure compensation at 0 so the bright sun doesn’t overpower the details. You can also enable Auto Exposure Bracketing if you’re up for blending a few exposures to capture a richly balanced scene.
Here are the settings to keep in mind:
- RAW format
- White Balance: Daylight or Cloudy
- Aperture: f/8–f/16
- ISO: 100–200
- Shutter Speed: 1/60 sec or slower (tripod needed)
- Metering: Evaluative
- Auto Exposure Bracketing: Enabled
Switching these settings as the sunlight fades can really make your sunset photos pop.
Composition Techniques for Stunning Sunset Shots on the Road

Try adding a striking feature like a lone tree, a weathered rock, or even a small pier to give your sunset photo some real scale and feeling. Picture a craggy rock standing boldly against soft, fading light, it helps guide your eyes from the detailed foreground into the warm, glowing sky. So, take a little walk around your subject and see what fresh viewpoints you can uncover.
Switch up your spots by shooting from both lower and higher angles. When you get low, the foreground really pops; when you climb higher, the vast sky becomes your canvas. Look for roads, pathways, or piers that naturally lead your gaze toward the sun as it slips away. Positioning the horizon or sun along key points using the Rule of Thirds (a guide to help balance your shot) gives your picture an effortless, natural charm.
Key composition tips include:
- Find a unique foreground element to set the scale.
- Try both high and low angles for fresh, exciting views.
- Use natural lines, like roads or piers, to draw attention to the setting sun.
- Apply the Rule of Thirds to keep everything balanced and inviting.
These simple techniques turn everyday snapshots into captivating stories filled with the magic of fading light. Enjoy the adventure and happy shooting!
Timing and Planning for Perfect Travel Sunset Captures

Timing your sunset photos can make an ordinary dusk feel truly magical. Start by checking an online search or a mobile app to find out when the sun will set at your spot. Arrive 30 to 60 minutes early so you have plenty of time to set up your camera and explore different angles. Imagine pulling up with your photography checklist, charged batteries, freshly formatted memory cards, a dependable tripod, and a clean lens cloth, ready to capture every bit of that golden light.
Seasonal shifts can change the sun's position, so using a compass or a mapping tool helps you adjust your framing as the light evolves. Stick around for an extra 10 to 15 minutes after sunset too. Those moments let you capture the sky as it shifts from a warm glow to a deep, enchanting blue while you experiment with exposure and composition. A little extra planning means that when the perfect moment arrives, your camera is ready, your gear is set, and you're in the ideal position to record those unforgettable twilight colors.
Post-Processing Tricks for Vibrant Sunset Imagery Abroad
Start by tweaking your RAW files gently. Adjust exposure, contrast, and white balance (that’s a way to control color balance) so you can make further changes without losing the sunset’s magic. It’s like preserving that golden glow while bringing soft details in the scene to life.
Next, lift the vibrance with care. A little nudge makes every ray of light feel warm, much like the moment you first saw it. Imagine a subtle slider that turns a dull scene into one that bursts with natural color.
Then, try out some graduated masks or gradient filters to even out the lighting. This simple trick blends the bright sky with a darker foreground smoothly. And if you want to go a step further, merge multiple exposures with HDR tone mapping to capture every rich color and shadow, just like nature intended.
Finally, when the light starts to fade, use noise reduction software to smooth out any high-ISO hiccups. This keeps your details crisp even in the softer light of dusk. Enjoy the process, and let each step bring your sunset images closer to the breathtaking moment you remembered.
Essential Gear and Accessories for Capturing Travel Sunsets

When you're out chasing that perfect sunset, having the right equipment makes all the difference. Start your adventure with a wide-angle lens (12-18 mm) to soak in the vast skies and sweeping landscapes that burst with color at dusk. And if you want to zoom in on the sun or catch a tiny, magical detail far away, grab a telephoto lens (100-400 mm) that lets you bring those enchanting elements closer.
A solid tripod is your best friend when tackling those lower light conditions, especially when slow shutter speeds are in play. A remote shutter release can also help you avoid any camera shake, so every shot stays sharp. Plus, a couple of protective filters like UV and polarizer filters work wonders for minimizing glare and deepening natural colors without the fuss of more complicated tools.
Don't forget to pack extra batteries and high-capacity memory cards. They keep you powered and ready as the light fades away. For more cool tricks on how to pack light and smart, check out expert packing tips for stress-free travel at MyInstaPalette.com. With this gear in your kit, you'll be all set to capture every breathtaking moment from that gentle pre-sunset glow to the magical scenes that follow the sun.
Final Words
In the action, you’ve gathered top tips for capturing sunsets on travel. We covered spot scouting using online tools, smart camera setups for fading light, creative composition, timing, and post-processing tricks to polish your dusk imagery.
Each segment brings you closer to those captivating evening scenes abroad. A little planning, the right gear, and fresh insights will make each sunset spark exceptional memories. Keep enjoying golden hour abroad and watch the colors light up your world!
FAQ
Frequently Asked Questions
What phone camera settings are ideal for capturing sunsets?
The phone camera settings for capturing sunsets should be adjusted to manual mode if available. Set the white balance to a warm tone, lower the ISO, and enable HDR to capture the sunset’s vivid colors clearly.
What are the best camera settings for sunset photography, including portraits?
The ideal settings for sunset photography include shooting in RAW, setting white balance to Daylight or Cloudy, using an aperture between f/8 to f/16, and keeping the ISO low (around 100). A tripod helps when slowing the shutter speed for clear portraits and landscapes.
How do I capture sunset photos with my smartphone?
For smartphone sunset photos, use a manual mode or an app with advanced features to adjust white balance for warm hues, tweak exposure for bright details, and experiment with different angles to highlight the setting sun’s colors.
What white balance Kelvin setting works best for sunsets?
A white balance in the range of 5000K to 6000K is best for sunsets. This range enhances warm hues and mirrors the natural glow of the setting sun, giving your photos a pleasing, true-to-life feel.
What is the best time and method to capture the perfect sunset?
The best time to capture a sunset is by arriving 30–60 minutes before the sun sets and staying 10–15 minutes after. This approach lets you set up your composition well and record the evolving colors of the fading light.